
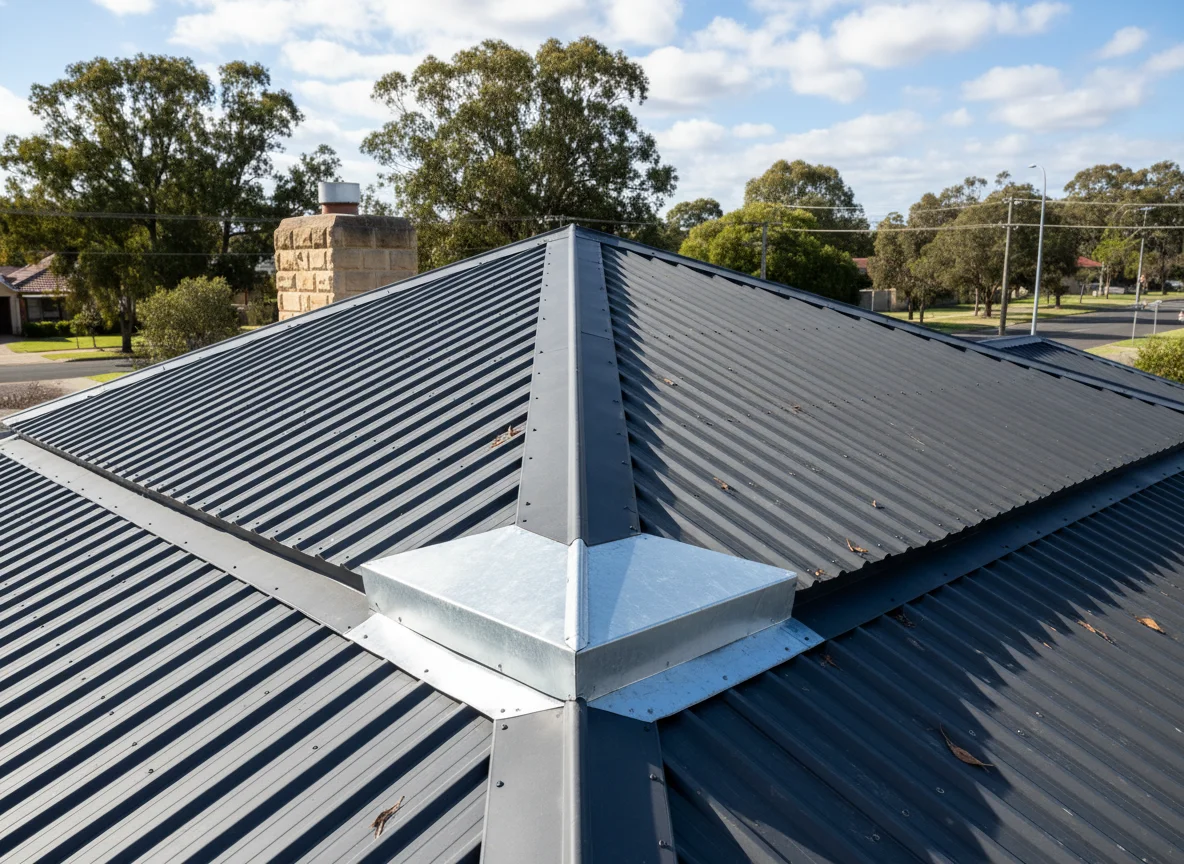
Water does not read a roof component name before it moves. On one roof, two planes lean towards an open valley and the flow is meant to gather along that line. On another, a skylight, duct, wall return or other obstruction sits upslope, so the flow has to be collected and sent around the block. A valley and a tray both involve folded metal, but the water story starts in different places.
That difference should lead the order. A roof valley flashing request begins with a continuous junction between roof planes. A back tray flashing request begins with an interruption of the normal pan or valley route. If the sketch does not show which water path is being described, the drawing can look tidy while still leaving the most important distinction unresolved.
Read the roof from high side to low side before naming the component. The open valley asks where gathered water is already intended to travel. The obstruction asks where water would go if nothing redirected it. Those two observations set up the rest of the drawing and stop the enquiry from becoming another generic request for a folded piece.
Start with the Open Valley Line
A valley is a line condition. The drawing should show the two adjoining roof planes, the direction of fall, the sheet profile and the item tag used for the valley component. A plan view helps locate the run. A section helps explain how the formed metal sits in relation to the sheets.
The valley view should also show whether the part belongs to a broader flashing set. A package may include ridge capping, barge pieces, apron flashings and trims in the same material and finish. Those items can share a roof area without being interchangeable. If the valley is tagged clearly, the schedule does not force one folded piece to carry another junction’s role.
A valley order should show whether the flashing runs with the sheet valleys or across them. Direction is a drawing note, not a drafting preference.
Also check the ends of the valley run. The upper end, lower end and any change in adjoining material can alter how the item is described in the schedule. The order does not need a narrative about the whole roof, but it does need enough location information to keep the valley from being read as a loose folded channel.
Then Read the Obstruction
A tray starts from a local block in the water path. The obstruction may be a penetration or another formed feature that interrupts normal roof flow. Show the obstruction outline, the high side and the intended leave path.
For the supply conversation, the specified tray shape should be visible. Show the obstruction outline, the high side, the intended water direction, the tray form and any sleeve or apron relationship already set by the project documents. Use uphill and downhill labels rather than front and back if those words make the route clearer.
The tray view should answer what the obstruction blocks and where the redirected water is meant to leave the blocked area. Stainless steel pressings may sit in the same pack when the project names that material. If the tray is drawn without the uphill context, the most important part of the drawing is missing. If a sleeve or apron is shown, keep it connected to the obstruction rather than leaving it as a separate accessory note.
Wesroof’s custom metal flashings and construction pressings source page supports bespoke flashings, gutters, downpipes and specialised trims made from site-specific measurements and architectural drawings. In this context it supports fabrication and supply of the nominated component. It does not decide whether the penetration detail, tray route or drainage strategy is suitable for the roof.
Two Drawing Views, Two Water Stories
The easiest way to keep the two junctions apart is to sketch them as separate water stories. Metal cladding can sit beside a related wall face. For a valley, the water is already gathered between planes and moves along a continuous line. For a tray, the water meets an obstruction and needs a defined route around it. The drawings should not collapse those stories into one generic folded angle.
Valley Sketch Versus Tray Sketch
A valley sketch usually benefits from a continuous line, section relationship, handed edge notes and the adjoining profile. Wesroof keeps that sketch with the fabrication enquiry. Aluminium pressings or stainless steel pressings may sit in the same pack when the project names those materials. Metal cladding can sit beside a related wall face. Light fabrication may apply if several prepared parts become one supplied item. A tray sketch usually benefits from the obstruction outline, high-side collection area, side diversion route and related sleeve or apron note if one is specified. If the same roof area includes both items, draw both views and tag them separately.
Concrete roof-layout examples help. Light fabrication may apply if several prepared parts become one supplied item. A simple hip roof with an internal valley is not asking the same question as a roof plane interrupted by a large penetration. A valley order measures the line where planes meet. A tray order measures the interruption and the path around it. The fabricator may fold both from similar materials, but the information needed to understand each part is spatially different.
Two Common Mix-Ups
This contrast also prevents two common errors. Aluminium pressings may sit in the same pack when the project names that material. The first is treating a tray like a decorative cover and omitting the high-side water context. The second is treating a valley like a plain angle and omitting the roof-plane relationship. In both cases, the missing information is not solved by a neater schedule.
The two views can sit on the same sheet, but they should not share one tag. The FAQ covers how we take an enquiry and what we do not install. Give the valley a line-based reference and the tray an obstruction-based reference. Then repeat those tags in the material note and quantity list. A reader should be able to cover one view with a hand and still understand the other component without borrowing information from the wrong junction.
Material Notes Follow the Path
Material and finish notes still matter because both items sit in a roof system. About Us covers the fabrication and supply scope. Name the material from the project documents. Do not infer it from the nearest roof sheet.
The order drawing should therefore state the nominated material, finish and visible face. If the same roof package uses sheets, stormwater parts or other steel building components, keep the valley and tray notes beside their own item tags. Wesroof’s construction pressing source lists Colorbond Steel, Zincalume and Galvanised Steel as primary construction materials, with stainless steel and aluminium options upon request. The related steel roofing and building materials page gives broader product context for sheets, tophats, battens, stormwater components, purlins and patio components.
That product context is not a material recommendation for every valley or tray. The roof covering, upstream surfaces, rainwater route and project specification should control the selection. If the material note is missing, the order is not ready for fabrication because the drawing asks the supplier to infer a decision that belongs elsewhere.
Only Then Place the Supply Boundary
After the valley path and tray path are understood, the commercial boundary can be brief. Wesroof can fabricate and supply the specified metal components from project measurements and drawings. The site detail, drainage design, compatibility selection, inspection, engineering, certification, approval and fitting remain with the responsible project parties.
The live homepage describes custom steel and sheeting solutions for construction and industry in Western Australia. That is fabrication and supply, not installation.
A good drawing will also show which decisions have already been made. If a designer has issued a reference detail, keep the drawing number with the item tag. If an installer, roofer or builder has supplied site measurements, keep them separate from the design notes. If the water path itself is unresolved, do not disguise that uncertainty as a fabrication query.
This later placement changes the tone of the page. The reader first learns how the valley and tray differ, then sees how a supplier conversation should be framed. The boundary is still firm, but it is not the main story. The main story is the route water takes through two different junctions and the drawings needed to express those routes.
Pause if the Water Route Is Still Unclear
The final check is not a long list of supplier instructions. It is a pause test. Can the valley line be traced from its upper end to its discharge direction without guessing the adjoining planes? Can the tray route be traced from the high side of the obstruction to the side diversion or related apron without inventing the drainage decision?
If either answer is no, resolve that missing view before sending the order. A clearer valley sketch might need a section through the roof planes. A clearer tray sketch might need the obstruction outline and uphill water direction. Both may need material, finish, visible-face, quantity and handed-piece notes.
When those decisions are documented, Contact us to check the current valley and tray scope. Keep the request specific to the named components.

Leave A Comment