
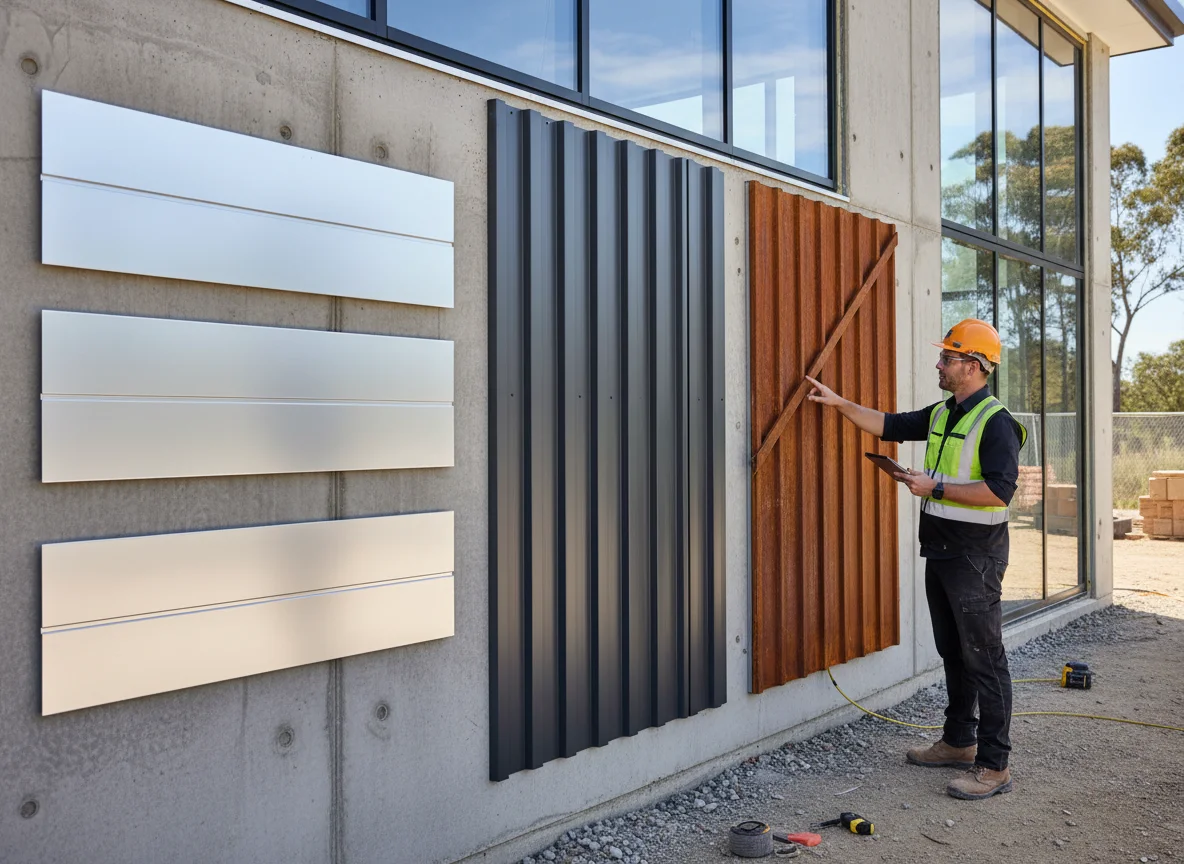
Choose the wall profile by testing three variables in order: cover, direction and finish. Cover decides the visible rhythm of sheet runs, direction decides how those runs meet openings and corners, and finish decides what has to be named clearly for sheets, trims and related pieces. If those variables are separated too late, the wall can look resolved in a mood image but remain vague as a supply brief.
A feature wall, a long service elevation and a return beside a roof edge can all use the same material family while needing different decisions. One may need quieter runs, one may need simple repeatable sheeting, and one may need a finish note that travels across trims. Treating colorbond wall cladding profiles as a three-variable choice keeps the discussion attached to the wall itself, not only to colour preference.
Cover Path: Read the Wall in Sample Bays
Start by imagining the elevation as a set of bays rather than a single rectangle. Aluminium pressings may sit in the same pack when the project names that material. A broad-cover cladding profile can make a large wall read with fewer visible joins, while a tighter rhythm can make a smaller feature panel feel more deliberate. Neither result is automatically right. The cover choice has to be checked against openings, corners, returns and any break between wall zones.
Wesroof’s Metal Cladding 280 page describes its cladding profile as an exterior wall and architectural facade option with broad coverage, clean lines and vertical or horizontal application. That source is enough to frame the enquiry around profile role and wall appearance. It is not a substitute for the project team deciding how the module should sit across the elevation.
For a large warehouse face, the cover question might be: how many sheet runs will be read from the street, and where will the unavoidable interruptions sit? For a residential feature wall, it might be: does the profile rhythm support the opening layout, or does it fight the windows and door heads? For an eaves return, it might be: does the chosen cover still make sense when the area becomes narrow and highly visible?
Cover Path: Convert the Choice into Wall Sheeting Notes
Turn Cover into Order Notes
Once the bay logic is visible, turn it into plain order information. Stainless steel pressings may sit beside a named stainless run. Mark sheet start points, sheet stops, main wall zones, short returns and any trims expected at the edge of a zone. Wall sheeting notes should not rely on a supplier guessing which part of the elevation matters most.
The cover note can be short. State the selected profile, where it applies, whether the run is continuous or broken into zones, and which drawings show the sheet layout. If two wall areas are being compared, name them separately. A front elevation, side return and small soffit lining can share a colour but still need separate notes if the run direction or visible face changes.
This step also helps keep related building materials out of one loose bundle. Custom metal flashings and construction pressings may sit in the same pack when folded pieces are listed. Sheets, trims, flashings, cappings and roof-edge pieces may belong in the same conversation, but each item still needs its own line. That is where a cover decision becomes more than an appearance preference. It becomes a readable supply request.
Direction Path: Follow Vertical and Horizontal Consequences
Direction changes the way a wall is read. Light fabrication may apply if several prepared parts become one supplied item. Vertical cladding tends to make base lines, heads, sills and roof edges interrupt a downward run. Horizontal cladding tends to make the wall read in bands, so corners, sill heights and changes in level become more obvious. A wall that feels calm in one direction may become visually busy when the sheet runs the other way.
Orientation affects coordination around windows, doors and corners. Keep that on the elevation. Wesroof keeps that with the fabrication enquiry.
A simple direction mark can prevent a lot of later confusion. Use arrows on the elevation, then repeat the same direction note in the schedule. If both vertical and horizontal zones are present, separate them before quantities are discussed. For colorbond wall cladding profiles, that separation is especially useful when the same finish is used on walls that turn a corner or meet another material.
Direction Path: Test Three Wall Examples
Test Direction on Three Walls
On a tall commercial facade, vertical direction may make the eye follow the height and expose every interruption at doors, canopy lines or service openings. On a long residential wall, horizontal direction may create a banded reading where sill height and corner return become the controlling details. On a small feature panel, either direction may work visually, but the answer should still be shown on the drawing rather than left as a verbal preference.
These examples do not decide the design for every project. The FAQ covers how we take an enquiry and what we do not install. They show why direction should be tested as its own pathway. The same cover can feel quite different when turned. The same colour can also look different when folds, edges and shadow lines face another way. If an elevation has several wall types, resolve direction for each wall before asking for supply.
If the direction is still undecided, prepare a comparison note rather than a broad request for advice. Option A can show vertical runs with the required trims. Option B can show horizontal runs with the same finish and a different trim logic. That lets the project team compare what changes before the enquiry is treated as settled.
Finish Path: Name the Visible Face Early
Finish has to be written as supply information, not left as a late colour idea. Name the colour, finish type if relevant, and visible face in the schedule. Check the colour against the project documents, not a memory of a past job.
A finish note that says only “dark wall cladding” is too loose. A better note states the material family, nominated colour, finish, where the face is exposed, and which trims or flashings should match or contrast. If the finish wraps around a corner, say so. If a capping, edge trim or roof-adjacent piece belongs to a different finish group, give it a separate line.
Wesroof’s steel roofing and building materials page refers to custom-length and profiled roofing and cladding sheets, along with steel components used in building packages. That supports a joined-up supply conversation. It does not mean every sheet, trim and accessory should be treated as one generic item.
Compare the Three Paths before Narrowing the Request
Run Cover, Direction and Finish in Order
The three checks work best in sequence. About Us covers the fabrication and supply scope. First, cover: does the profile create the intended rhythm across the wall zones? Second, direction: do the runs meet openings, corners and roof-adjacent edges cleanly on the drawing? Third, finish: can every exposed face and related trim be named without relying on a screenshot or memory?
A clean comparison can be no more than a few labelled paragraphs in the project file. Front wall: selected profile, vertical direction, nominated finish, matching trims. Side return: same profile, changed direction if required, separate edge pieces. Feature panel: selected profile, finish emphasis, linked corner trim. The point is not to create a large packet. The point is to keep the three variables visible together.
A Wesroof supply request should state the selected cover, direction and finish, with the relevant wall zones, cladding sheets, trims and related components kept together.
A small comparison also gives each stakeholder a cleaner job. The designer or builder can choose between the elevation effects. The person preparing the order can keep sheets, trims and finish notes in separate lines. The supplier can read the chosen path without being asked to decide the wall design. If the same wall has a display zone and a back-of-house zone, write the difference down instead of hiding both in one quantity.
Keep broader wall performance, approvals, onsite set-out and installation decisions with the responsible project parties. Wesroof can receive the supply information once those decisions have produced a clear profile, direction, finish and item list. Placing that boundary after the three paths keeps the article centred on the decision, not on a disclaimer.
Supplier Conversation: Compare before Requesting a Quote
The strongest enquiry is the one that arrives after the comparison has been narrowed. Include the marked elevation, selected profile, sheet direction, finish schedule, trim list, opening references and any related steel or roof-edge items that affect the supply discussion. If a finish or direction is still being compared, say that plainly and keep the options separate.
Before sending, remove any line that asks the supplier to choose the design outcome. Replace broad wording with the selected wall zone, profile, direction, finish, trim group and revision reference. If a colour sample is pending, record it as pending. If a direction choice is still between two options, show both options as options rather than blending them into one request.
When the comparison is ready to share, Contact us to send the resolved cover, direction and finish notes. Leave design, site fitting and approval with the project team.

Leave A Comment