
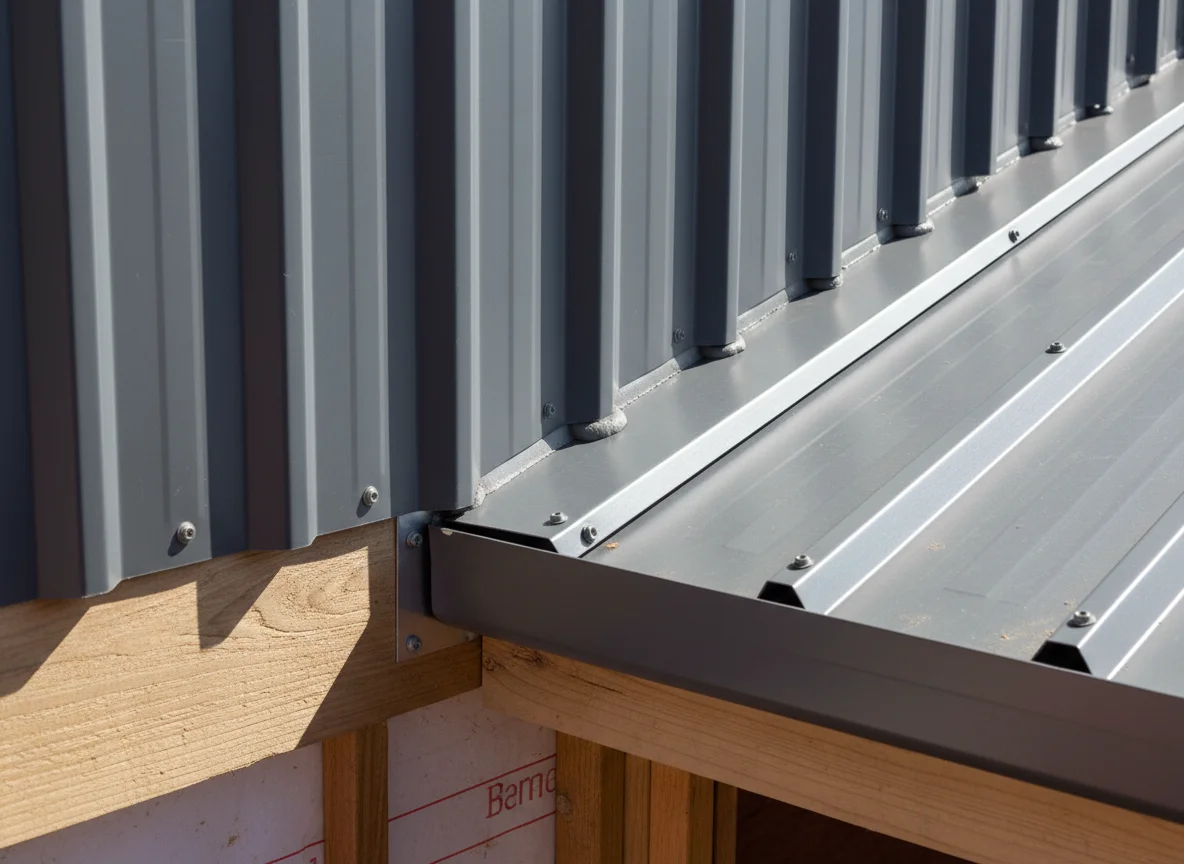
At the roof-to-wall line, read the parts in sequence before naming the pressing. First comes the roof plane, then the wall plane, then the water path, then the flashing or trim that connects the two, then the nearby edges that may change the part. If one step is skipped, a request for a wall flashing can sound complete while still leaving the workshop without the actual junction story.
The useful starting point is not a long disclaimer. It is a traced path across the drawing. Follow where the roof sheet stops, where the wall face begins, how the sheeted wall is oriented, what the folded metal is expected to dress, and which corner, opening or return sits beside it. That sequence keeps metal sheet cladding, roof sheeting and fabricated trims in their proper order.
Plane One: Locate the Roof Edge
Start with the roof plane because it often controls the first change of direction. Stainless steel pressings may sit beside a named stainless run. Is the roof sheet finishing against a wall, running beside a wall, stopping below a parapet, meeting a change of pitch or turning into an eaves line? Those conditions should be visible on the project drawing before the flashing name is chosen.
Do not order one generic item for every roof-to-wall junction. Name the condition on the drawing. Aluminium pressings may sit in the same pack when the project names that material.
A roof plane note should identify the roof sheet profile, the finish if it is visible, the direction of fall shown on the project drawings and any linked capping, closure or gutter-adjacent component. If a junction repeats along several elevations, list the locations. If a left hand and right hand version may exist, name them before quantities are treated as final.
Plane Two: Set the Wall Face before the Fold
The wall plane carries its own logic. Light fabrication may apply if several prepared parts become one supplied item. It has a profile, direction, start point, stop point, finish face and relationship to corners and openings. If that wall face is not fixed, the flashing around it cannot be described with confidence. The detail has to show whether the cladding is above, below or beside the roof edge, and whether it runs vertically or horizontally.
Wesroof’s Metal Cladding 280 page describes a profile for exterior walls and architectural facades, with applications including commercial facades, industrial unit cladding, residential feature walls, eaves and architectural screening. For a supply brief, that supports naming the cladding profile, application direction, finish and associated trims together.
Mark the Wall Face
A marked elevation is often clearer than a paragraph of explanation. It shows the cladding rhythm, where sheets stop, where trims conceal or expose edges, and where material changes become visible. If the elevation conflicts with the roof section, settle the conflict in the project documents before fabrication is requested.
Water Path: Keep the Route on the Drawing
Water-path decisions belong with the project detail. Show the documented outcome on the drawing. Do not ask the supplier to invent the route. The FAQ covers how we take an enquiry and what we do not install.
For a clear request, show the documented outcome. The enquiry can state which detail governs the junction, which face is exposed and which pressing or trim has been nominated. It can ask whether the attached information provides enough bend, material, finish and quantity detail for a supply discussion. It should not ask the fabricator to approve the drainage design, select a substitute detail or make site decisions. Wesroof keeps that with the fabrication enquiry.
This water-path step also prevents mismatched language. A line that says “flashing to suit” can hide whether the part is dressing a sheet end, a side wall, a capping break or a cladding termination. A line that says what the flashing is doing gives the workshop something real to read.
Flashing Function: Name the Job, Then the Shape
The word wall flashing can mean several jobs. It may dress a roof sheet end against a wall, sit beneath cladding as an apron, cap a wall edge, return around a corner, finish a facade break or work beside window and door trims. The function comes before fold sizes because the function explains why the folds are being drawn.
Wesroof supplies custom metal flashings and construction pressings for construction and building work, including roof flashings, gutters, downpipes and specialised trims from project measurements and drawings. For a roof-to-wall junction, the enquiry should therefore include the governing drawing, intended pressing shape, material or finish, quantity context and location schedule.
A useful flashing note might say: roof sheet end against cladded wall, visible face to outside, linked to corner return, same finish as nominated wall trim. Another might say: side-wall junction on roof plane, separate from upper capping, finish to match roof sheet. Those are examples of clearer description, not universal detailing instructions.
Adjacent Edges: Corners, Openings and Returns
A junction rarely sits alone. Nearby window heads, door reveals, soffit edges, fascia lines, parapet turns and external corners can change the trim group around the roof-to-wall line. If the schedule lists only one pressing but the drawing shows several adjacent pieces, the supply request is not yet readable.
Corners, Openings and Returns
Separate the main run from interruptions. Corners may need handed pieces. Openings may need their own trim names. Returns may make the visible finish side more important. A short wall beside a roof edge may need a different item group from the long elevation next to it. That is still a supply organisation task, not a new design claim.
Carry specified material names consistently. Leave project-specific approvals with the responsible parties. Steel roofing and building materials may sit in the same pack when sheets are listed. The FAQ covers how we take an enquiry and what we do not install.
Packet Sequence: Group Parts by Plane and Path
A roof-to-wall fabrication packet should follow the same order as the reading sequence. Begin with the plan or elevation that locates the junction. Add the roof section that shows how the roof sheet approaches the wall. Add the wall elevation that shows cladding direction and finish. Add the flashing or trim drawing that shows the fold path. Add the schedule that lists material, finish, quantities, lengths and revisions.
Group Parts by Plane
Then group the parts. Roof sheets belong together. Metal sheet cladding belongs with wall-specific trims. Each wall flashing and related pressing should sit beside its linked drawing. Cappings, corners and closures need their own notes if they are separate items. This grouping makes revision changes easier to see when one drawing moves and another stays current.
The Wesroof point in this sequence is fabrication and supply of the documented cladding and folded components after the roof-to-wall information is settled.
A grouped packet also makes omissions easier to spot. About Us covers the fabrication and supply scope. If the roof plane has a current revision but the wall elevation still carries an old finish note, the mismatch is visible. If a corner return has a handed version but the quantity line treats every piece as identical, the schedule can be corrected before the workshop reads it. If the water path depends on a separate project decision, the packet can point to that decision rather than trying to restate it.
The boundary can stay brief here. Wesroof can fabricate and supply nominated cladding, flashings or pressings from clear project information. The project team keeps design approval, installation method, onsite set-out, weathering decisions and compliance sign-off in the project file.
Pause if the Sequence Breaks
Before contact, run a finger across the detail in order: roof plane, wall plane, water path, flashing function and adjacent edges. If any part of that route is uncertain, pause the quote request and clarify the drawing. A missing finish face, handed version, linked corner or current revision can change how the item is understood.
Do the same check at each neighbouring edge. A roof-to-wall line beside an opening may need different trim notes from the same line on a plain wall. A return that changes colour may need a separate finish-side note. A repeated junction may still need separate lines if one side of the building mirrors the other. These are small checks, but they keep the enquiry from becoming a single label for several different parts.
One final review should compare the drawing title with the item list. If the title says roof edge but the schedule says facade trim, ask which description controls. If the same detail appears on two drawings, make the current one obvious.
When the path is clear, Contact us to send the marked drawings, profile information, material schedule and quantities.

Leave A Comment